Projects
Wednesday, March 25, 2015
Deciding my Logo
When making a logo it is important to consider how you want it to be portrayed, how you want the public to look at this branding you have created to express yourself or your company. This becomes even more important when you are trying to create a logo that represents you and what it is that you do. It's one thing to create a branding logo for a company, more often than not the name of the company is usually what the logo is going to be based around, from companies like Lions Gate or Bad Robot, this situations make it easier because they give you a basic idea of where to start for the logo. When creating a logo for yourself it becomes a little more complicated, in some professions yourself can be your logo, in other cases such as the entertainment industry, if you are an artist your logo usually needs to be a little more creative. In most cases people will take the first letters of their first and last name, sometimes even their middle name and combine those letters to make a symbol to represent themselves. Another way they use their initials is by taking them and setting them in a specific legible font that suits them best and center it in a symbol with colors that best represent themselves. Another way one can do this is to make a symbol figure that they can use to represent them, either of an object or even a character, the character can even be yourself, as long as you create the image based on your own artistic style. In my case I plan on using an object that represents me and the different activities that I do within my industry.
Wednesday, March 18, 2015
Time contrain texturing.


When doing projects sometimes things don't always go your way, or at least not as originally planed. This can be the case when working on personal/solo projects, or even a group/team project. From a model not working the way you want or strictly the amount of time you have as apposed to how long it would take you to finish a certain task. This particular project of mine is based off of a group of people. Due to some setbacks in our process of creating a game together, as well as the time constraint that we have to do said project, we must proceeded to down size some of our goals in order to meet the deadline. We are in the process of shortening the game from a large world to a section of the world that was being planned to be created. As well as this current step that i am working on, the texturing of some of our set pieces for the level. Originally the idea was to use a texture atlas for all of the little pieces that would be placed around our game, modular pieces, which as I've discussed previously, are puzzle pieces of buildings, hallways, stairs, whatever it is that you would need that can be used repetitively as apposed to making new pieces for every level of your game. The atlas would essentially be a giant map that would be split into categories, each category would hold certain pieces of terrain and object to all be textured in one map and split among all the objects the categories correspond too. However the process of the atlas has been scrapped and instead a few have been assigned to speed texture the assets that we have ready. This is a project i was recently assigned to in order to finish it in a timely manner, for this to work one must make sure with others apart of the same task are using similar if not the same textures to set up all these maps for the assets.
Labels:
constraints,
Level,
Maya,
projects,
Team Production
Wednesday, March 11, 2015
turtle Droid
For this project I am making a little droid/robot for a little programming exercise. The end goal will have my droid go against several other peoples droids in a free for all battle. This programming isn’t a simple first or third person game, but more of a program to win set up. To explain, every person must make their own little droid, we can make it look as we please, however it must meet certain criteria. It must be able to fit in a cube hitbox, it must be able to move forward, back, left and right and even turn. It must have some sort of shooting weapon and a way for it to grab/pick up objects. Style and how the droid shoots are up to us, but the group will be going over way stop keep everything balanced, such as a low damage weapon with high fire rate or a high damage weapon that can only shoot one shot at a time with a fairly long reload time. My droid i decided to shape like a turtle and attach a rail gun like weapon to its back, so mine will be high damage low fire rate. Now how the competition goes is that everything that our droid does must be programmed without needing any further assistance from a user, this meaning when the game starts the droid is on its own and hopeful how it was programmed will cause it to be able to win on its own. Everyone will have the same base of coding and it will be altered based on their weapon, droid, and any ideas that one may think of to help give their droid an edge to win, without it being an unfair advantage, such as flying or burrowing.
Wednesday, March 4, 2015
GraveTree
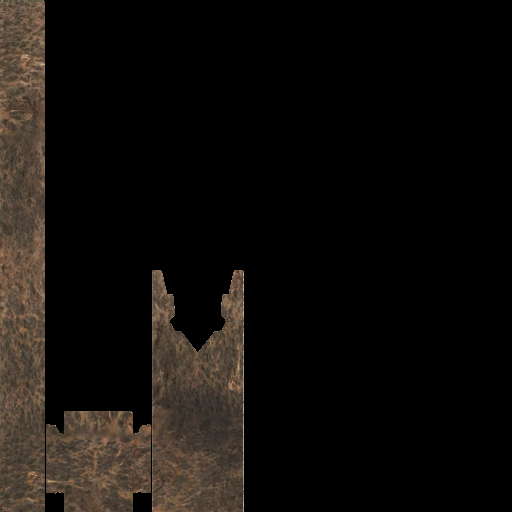
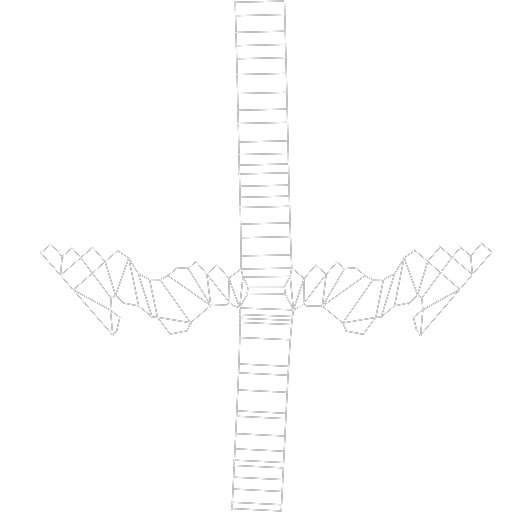
This project is a continuation to my previous modular project of the crypt/graveyard area. This particular modular piece is a tree that I will place in a few places of the graveyard map. The tree will not have foliage on it, but instead be a dead tree, it will be textured. While the other modular pieces I had created for the crypt are in 3DS Max, this particular part of the project I am creating in Maya. The reason being is that I find Maya has a much better system when you want to create things that have a more organic feel and structure to them. So for this reason, this particular piece I decided to go ahead and do in Maya, I have created the structure I wanted out of it and am currently unwrapping it for texturing so that I may finish that up and place it within a scene to run around with the Unity game engine. The UV mapping is essentially taking the object and flattening it out to pain in programs such as Maya, the reason you want to UV it out is to make sure there is no stretching within the UV's or it will stretch and distort your texture that you apply.
Project Sucu
This is the start of my process of creating a character, in this picture I have the basic structure of the character without any specific details and a reference image. When creating assets, whether they be for games or animation, it is usually a good idea to have some sort of reference image to help guide you as you create said asset. For this project I am working on a female character so I have a reference image of a female in the background to help guide the basic shape of the character. You can use reference images in many ways, you can use a basic one to get the basic structure of your asset down, or you can even used a more detailed reference that is what you want your character to come out looking like. Either choice can work fine, it all depends on yourself and what work flow is most comfortable for you. For this project I am using Zbrush to model out and sculpt my character, in this program I will sculpt out most of if not all the details I want, I should also be able to UV map my character so that I may apply textures to the model after it is done. Especially if you are creating a character for a game, simply sculpting it out will not work because it will create way too many polys to be ran effectively within your game engine. So after I am done and happy with my sculpt I will also be re-topping my the sculpt so as to lower the amount of polys being used on the character for the game. Then after re-topping I will be exporting the finished model into Maya so as to rig and animate it.
Wednesday, February 25, 2015
Modular Set-up
I am working on building a level in 3DS Max, the idea for the level is that of a crypt. I am setting up for the scene to be an outside, dark and dreary place leading to the inside of the crypt. This leading down to a darker area where the bodies would be laying. The way the level is being set up is in that of a modular setting. To make a level modular is to make everything into set pieces that you can put together as a puzzle after you have it all modeled and textured out. One can make multiple walls, floors, ceilings and even objects such as tombstones to be placed either together to create a closed off building, fencing, or wall. You can even take the smaller objects and place them where you wish throughout the map, which is usually done with small things like boxes that you can find sporadically in Halo or many other games. This is done in different games, sometimes to make multiple different levels within the same building or even in making an entire large city for the main character to travel around in. In my sense of the crypt, I plan to have a few different walls, some columns, trees, tombstones, even doors and gates to populate my level. With that I can set up a graveyard scene, making several markings with tombstones pointing out that there are many buried, even make a few different crypt sets that don't work to take you to another area and leaving one that is different and is where you need to go. Having multiple possibilities that don't work and one that does is a way to keep the player immersed into the game and making it so they won’t finish too quickly.
Tuesday, February 24, 2015
Stewart animation
One particular part of game design is that of the animation of your characters for said game. For this project I am going to be animating this preset character/rig to do some pantomime animations. Essentially to pantomime is to express actions without the use of words or sound. I will be using this rig to do actions like jumping, diving, even different sorts of attacks. Rigs like this are good to get down the basic move functions and actions for characters and to better learn the steps of animation so that you can raise your skill level. The actions I will be laying out will be in an eleven second long animation to see how well i can organize and set up a scene. This particular model and rig is named Stewart and is a great use to get down poses and actions, I will be using him for this set up.
Subscribe to:
Posts (Atom)


